
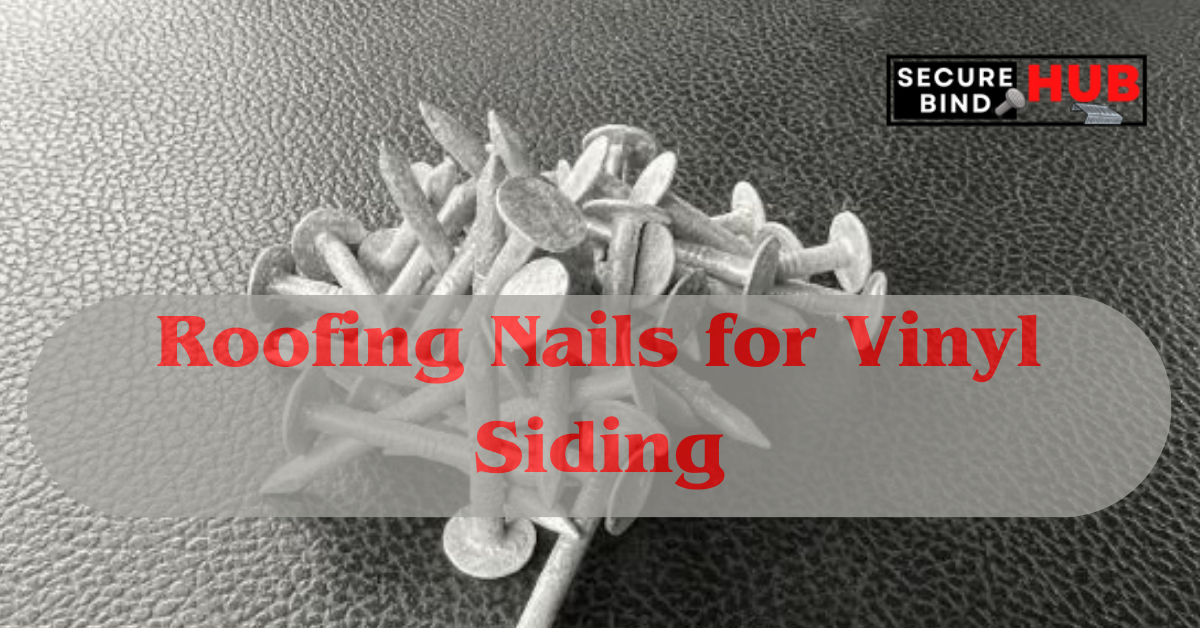
Roofing nails for vinyl siding may seem like a minor detail in the grand scheme of home construction or renovation, but they play a crucial role in ensuring the longevity and stability of your siding. Whether you’re a seasoned contractor or a DIY enthusiast, understanding the nuances of nails for vinyl siding is vital to achieving a successful and long-lasting siding installation.
In this comprehensive guide, we will delve into the world of roofing nails, exploring their types, functions, installation techniques, and much more. We’ll equip you with the knowledge you need to make informed decisions and tackle your siding project with confidence.
Types of Roofing Nails for Vinyl Siding
When it comes to vinyl siding, not all nails are created equal. Choosing the right type of roofing nail is paramount to a secure and visually appealing installation. Here are some popular options:
- Galvanized Roofing Nails
Galvanized roofing nails are the go-to choice for vinyl siding. These nails are coated with zinc, making them highly resistant to rust and corrosion. They provide exceptional durability in various weather conditions.
- Stainless Steel Roofing Nails
Stainless steel nails are another excellent choice for vinyl siding. They offer exceptional corrosion resistance and are ideal for coastal or high-moisture environments.
- Aluminum Roofing Nails
Aluminum roofing nails are lightweight and corrosion-resistant. They are a suitable option for vinyl siding, especially if you’re looking for ease of use and durability.
- Ring Shank vs. Smooth Shank Nails
Consider whether you want ring shank or smooth shank nails. Ring shank nails have ridges that provide extra holding power, while smooth shank nails are easier to drive into the siding.
Selecting the Right Length
The length of the roofing nails is crucial for a secure siding installation. Using nails that are too short may not hold the siding securely, while nails that are too long can damage the underlying structure. Here’s how to determine the appropriate length:
- Measure the combined thickness of the siding and any sheathing.
- Add an extra 1/4 inch to ensure the nail penetrates into the sheathing or studs.
Installing Roofing Nails for Vinyl Siding
Now that you’ve selected the appropriate roofing nails let’s dive into the installation process:
- Prepare the Surface
Before installing the vinyl siding, ensure the surface is clean, smooth, and free from debris. Any irregularities in the surface can affect the siding’s appearance and durability.
- Start at the Bottom
Begin the installation at the bottom of the wall and work your way up. Ensure there is adequate space for the siding to expand and contract in response to temperature fluctuations.
- Spacing Matters
Properly space the nails to allow for expansion and contraction. Follow the manufacturer’s guidelines for spacing, which is typically around 16 inches apart.
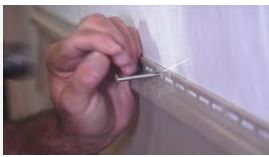
- Nail Angle
Drive the nails in at a slight upward angle. This ensures a snug fit and prevents the siding from sagging.
- Nail Placement
Nail placement is crucial. Drive the nails through the center of the siding’s nailing slots to allow for movement.
- Avoid Over-Driving
Be cautious not to over-drive the nails. Over-driving can damage the siding or create gaps between panels.
- Use a Nail Gun or Hammer
You can use either a nail gun or a hammer to install nails for vinyl siding. A nail gun may speed up the process, but a hammer gives you more control.
Maintenance and Repairs
Proper maintenance and timely repairs are essential to ensure the longevity and performance of your vinyl siding installation. In this section, we’ll explore the key aspects of maintaining and repairing vinyl siding, with a specific focus on roofing nails.
Inspecting Vinyl Siding for Loose Nails
Regular inspections of your vinyl siding are vital to catch and address issues promptly. Loose or protruding nails can not only affect the appearance of your siding but also compromise its weather resistance. Here’s how to inspect for loose nails:
- Visual Inspection: Conduct a visual inspection of your siding, paying close attention to the seams, corners, and areas around doors and windows.
- Listen for Sounds: Sometimes, you can detect loose nails by lightly tapping on the siding with a rubber mallet. Loose nails may produce a hollow or rattling sound.
- Gently Press: Apply gentle pressure to the siding with your hand. If you notice any movement or flexing, it could indicate loose nails.
If you discover any loose nails during your inspection, it’s essential to address them promptly to prevent further damage.
Replacing Damaged or Missing Nails
When nails become damaged or go missing, they should be replaced promptly to maintain the structural integrity of your vinyl siding. Here’s how to go about it:
- Identify the Problem Areas: Use your inspection findings to pinpoint the locations where nails are damaged, missing, or loose.
- Remove Damaged Nails: Carefully remove any damaged or loose nails using a pry bar or a specialized siding tool.
- Select Appropriate Replacement Nails: Choose replacement roofing nails that match the type, size, and coating of the original nails used during installation.
- Secure New Nails: Gently drive the replacement nails into the existing holes, ensuring they are flush with the surface of the siding.
Regularly checking for damaged or missing nails and promptly replacing them will help prevent siding panels from coming loose or becoming damaged during adverse weather conditions.
Re-caulking as Necessary
In addition to nail maintenance, re-caulking can be a crucial part of keeping your vinyl siding in excellent condition. Caulking is often used around windows, doors, and other openings to seal gaps and prevent water infiltration. Here’s how to approach re-caulking:
- Inspect Caulk Seals: Regularly inspect the caulk seals around windows, doors, and any other openings in your siding for signs of wear or damage.
- Remove Old Caulk: If you notice cracked or deteriorated caulk, carefully remove the old caulk using a caulk removal tool or a utility knife.
- Apply New Caulk: Apply a high-quality exterior caulk that is compatible with vinyl siding. Make sure to fill any gaps or cracks completely and smoothly.
Proper caulking helps maintain the weather resistance of your vinyl siding and ensures that moisture cannot penetrate behind the siding, potentially causing damage to the underlying structure.
By following these maintenance and repair practices, you can extend the lifespan of your vinyl siding and keep it looking great for years to come. Regular inspections, nail replacements, and re-caulking as needed are the keys to preserving the beauty and functionality of your siding.
Frequently Asked Questions
How long do vinyl siding and roofing nails typically last?
Vinyl siding can last 20-40 years, depending on factors like maintenance and climate. Roofing nails, if chosen correctly, can last just as long.
Can I use regular nails for vinyl siding?
It’s not recommended. Roofing nails for vinyl siding are designed to resist rust and provide a secure hold, which regular nails may not achieve.
What should I do if I accidentally over-drive a nail during installation?
If you over-drive a nail, remove it carefully and replace it with a new one. Proper nail placement is crucial for the siding’s integrity.
Can I paint vinyl siding?
Yes, you can paint vinyl siding, but it’s important to choose the right paint and follow proper preparation and application techniques.
Is professional installation necessary for vinyl siding?
While DIY installation is possible, professional installation ensures the best results and warranty protection.
How can I prevent mold and mildew on vinyl siding?
Regular cleaning and ensuring proper drainage around your home can help prevent mold and mildew growth on vinyl siding.
In The End
Roofing nails for vinyl siding may be a small detail, but they have a significant impact on the overall quality and longevity of your siding installation. By choosing the right type, length, and installation techniques, you can ensure a secure and visually appealing siding project that will stand the test of time.
So, whether you’re embarking on a DIY project or hiring a professional, remember that the devil is in the details, and choosing the right roofing nails is a crucial step towards a successful vinyl siding installation.
Related Topics:
- What Gauge Nails for Fence Pickets
- What Size Air Compressor for Framing Nailer
- Paslode Nail Gun Flashing Green Light
- 21 vs 30 Degree Framing Nailer
- Can I Use Ramset Nails on Hilti Gun
- Can You Use Any Type of Nail in a Nail Gun